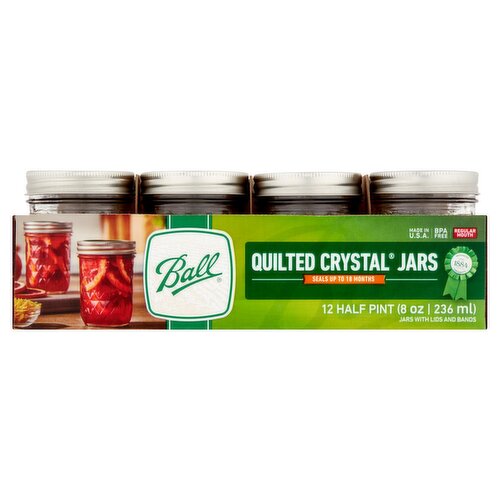
Ball Quilted Crystal 8 oz Regular Mouth Jars with Lids & Bands, 12 count
Brand Information
Recognized for quality - Est. 1884 Newell brands
Preparation & Usage
Ball® Recipe Card Blood Orange-Ginger Marmalade Preserving method: Water bath canning Makes about: 6 half pint jars (8 oz | 236ml) Directions 1. Quarter 6 blood oranges lengthwise then cut quarters crosswise into thin slices. Place orange slices in a large saucepan, add water to cover and bring to a rapid boil. Remove from heat, cover and let stand at room temperature at least 8 hours. 2. Juice remaining 6 blood oranges, discard rinds. Use a slotted spoon to transfer blood orange slices to a clean 6 qt. saucepan, reserve the soaking liquid. 3. Combine blood orange juice with enough soaking liquid to measure 4 cups total. Discard remaining soaking liquid. Add the blood orange juice mixture, and remaining ingredients to blood orange slices. Bring mixture to a rolling boil over high heat; reduce heat, simmer uncovered until marmalade has thickened and reached gel point, 220° on a thermometer. 4. Enjoy now, or process for 10 minutes using indicated preserving method. Store up to 18 months with Ball® canning lids. See bottom of tray or FreshPreserving.com for full preserving instructions. Recipe excerpted from the Ball® all new book of canning and preserving, published by Oxmoor House 2016. Ball® Complete Home Preserving What You Need Canning recipe See FreshPreserving.com, Ball Blue Book® guide to preserving, or any of our other Ball® canning cookbooks. Fresh ingredients Jars and two-piece lids (lids and bands) Water Bath Canning Method for High-Acid Foods You will also need a Ball® 21-quart water bath canner and a Ball® utensil set for preserving, which includes: jar lifter, bubble remover and funnel 1. Preheat Jars Fill water bath canner to cover empty jars by at least 1 inch of water. Heat jars to simmer (180°F) to prevent jar breakage. 2. Fill the Jars Following a tested canning recipe, fill a hot jar with prepared food leaving space between the food and the rim (headspace) as indicated in the recipe. 3. Tighten Lids and Bands Wipe any food from the rim of the jar. Center new lid on the jar, then twist on band just until fingertip tight. 4. Process Jars Place filled jars onto rack in simmering water. Repeat steps 2 and 3 for additional jars. Filled jars should be covered by 1 inch of water. Place lid on canner and heat to steady boil. Boil jars for the time specified in recipe, adjusting for altitude (see chart). 5. Cool Down Turn off heat and remove canner lid. Let jars stand in water for 5 minutes. Remove from water and cool jars upright on cutting board, wire rack or towel on countertop for 12 to 24 hours. Tips & Tricks If you don't have a rack designed for home preserving, use a cake cooling rack or extra bands lied together to cover the bottom of the pot. Pressure Canning Method for Low-Acid Foods You will also need a pressure canner with a flat canning rack and a Ball® utensils set for preserving, which includes: jar lifter, bubble remover and funnel 1. Preheat Jars Fill pressure canner with 2 to 3 inches of water. Heat jars to simmer (180°F) to prevent jar breakage. 2. Fill the Jars Following a tested canning recipe, fill a hot jar with prepared food leaving space between the food and the rim (headspace) as indicated in the recipe. 3. Tighten Lids and Bands Wipe any food from the rim of the jar. Center new lid on the jar, then twist on band just until fingertip tight. 4. Fill Canner with Jars Place filled jar onto rack in simmering water. Repeat steps 2 and 3 for additional jars. Pressure canner should contain 2 to 3 inches of simmering water. Lock canner lid into place. 5. Process Jars Turn heat to medium-high and open vent. Bring to boil and vent a stream of steam for 10 minutes. Close vent per manufacturer's instructions. Achieve and maintain recommended pressure for the time indicated in tested recipe, adjusting for altitude. (see chart). 6. Cool Down After processing in complete, follow manufacturer's guidelines for cooling and removing pressure canner lid. Remove from water and cool jars upright on cutting board, wire rack or towel on countertop for 12 to 24 hours. If you are preserving at an altitude higher than 1,000 feet above sea level, adjust processing time as indicated for water bath canning. For pressure canning, adjust pounds of pressure as indicated. Altitude Water Bath Canning Altitude Feet: 1,001 - 3,000; Increase Processing Time: 5 minutes Altitude Feet: 3,001 - 6,000; Increase Processing Time: 10 minutes Altitude Feet: 6,001 - 8,000; Increase Processing Time: 15 minutes Altitude Feet: 8,001 - 10,000; Increase Processing Time: 20 minutes Altitude Pressure Canning Altitude Feet: 0 - 1,000; Weighted Gauge: 10; Dial Gauge: 11 Altitude Feet: 1,001 - 2,000; Weighted Gauge: 15; Dial Gauge: 11 Altitude Feet: 2,001 - 4,000; Weighted Gauge: 15; Dial Gauge: 12 Altitude Feet: 4,001 - 6,000; Weighted Gauge: 15; Dial Gauge: 13 Altitude Feet: 6,001 - 8,000; Weighted Gauge: 15; Dial Gauge: 14 Altitude Feet: 8,001 - 10,000; Weighted Gauge: 15; Dial Gauge: 15 Check The Seal • After cool down, press on center of lid. If jar is fully sealed, the lid will not flex up or down. Remove the bands and attempt to lift lids off with your fingertips. Properly sealed lids will remain attached. • Wipe canning jars, lids and bands. Store sealed jars in pantry for up to 18 months. Jars may be stored with or without bands. • If a lid fails to seal within 24 hours, immediately refrigerate the product. Or for directions on how to safety re-process the jar, see FreshPreserving.com or the Ball Blue Book® guide to preserving. Enjoy your homemade food or give as gift.
Features
BPA free
Seals up to 18 months
Legal
ACTUAL PRODUCT PACKAGING AND MATERIALS MAY CONTAIN ADDITIONAL AND/OR DIFFERENT INGREDIENT, NUTRITIONAL OR PROPER USAGE INFORMATION THAN THE INFORMATION DISPLAYED ON OUR WEBSITE. YOU SHOULD NOT RELY SOLELY ON THE INFORMATION DISPLAYED ON OUR WEBSITE AND YOU SHOULD ALWAYS READ LABELS, WARNINGS AND DIRECTIONS PRIOR TO USING OR CONSUMING A PRODUCT. IF YOU HAVE QUESTIONS OR REQUIRE MORE INFORMATION ABOUT A PRODUCT, YOU SHOULD CONTACT THE MANUFACTURER DIRECTLY. CONTENT ON THIS WEBSITE IS FOR GENERAL REFERENCE PURPOSES ONLY AND IS NOT INTENDED TO SUBSTITUTE FOR ADVICE GIVEN BY A PHYSICIAN, PHARMACIST OR OTHER LICENSED HEALTH CARE PROFESSIONAL. YOU SHOULD NOT USE THE INFORMATION PRESENTED ON THIS WEBSITE FOR SELF-DIAGNOSIS OR FOR TREATING A HEALTH PROBLEM. WAKEFERN FOOD CORP. AND ITS SERVICE PROVIDERS ASSUME NO LIABILITY FOR INACCURACIES OR MISSTATEMENTS REGARDING ANY PRODUCT.